
One of the things I did during my hiatus was do a mini-redo of our kitchen. When we moved into Stratford House, the kitchen was fine. Perfectly functional and relatively new, but not exactly to our tastes. Of course, the problem with a kitchen like that is that it doesn’t make sense to redo it (especially when you find another roof leak, as we did last night in the Nuni’s room. Arrgh. This winter has been tough. And apparently our roof has no flashing.)
Here is the saddest, most pathetic “Before” ever – nighttime, and a total mess (Included mostly to enhance the after!)
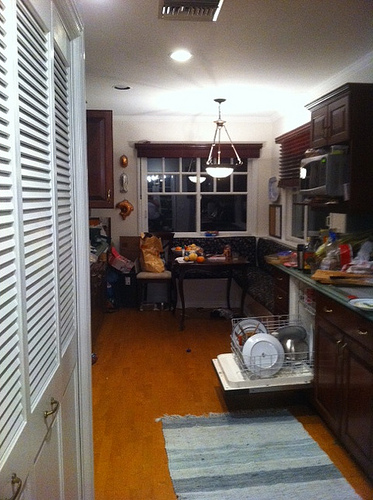
Not much I can do about the dark wood cabinets at this stage, or the green countertops (I think they’re silestone, which is actually totally functional. I just wouldn’t have chosen green.)
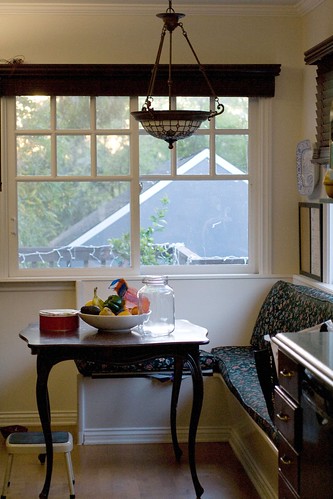
Here’s another, slightly less pathetic “before” — allows you to see the built in banquette, and the Tiffany style hanging light (Yuck — both the stained glass and the shape) and the floral tapestry cushions. Most of all, you can see the completely inappropriate kitchen table we had in there. We inherited a bunch of furniture, and we put that antique game table in the kitchen as a place holder. It was exactly the wrong size, and shape, and function.
The first thing I wanted to tackle was our kitchen table. I wanted a table where we could sit and eat for informal meals, and one that could function as an extra work surface, and make the room feel more “me.”
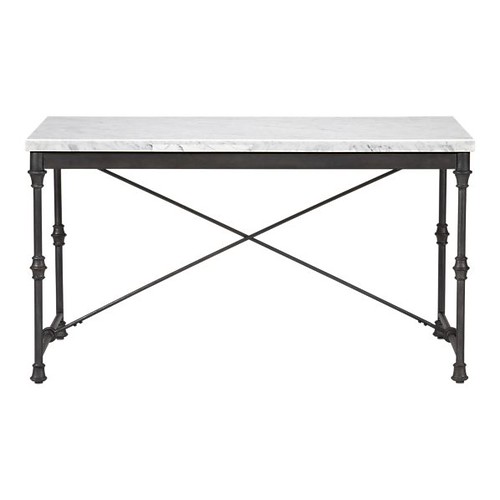
Initially, I had my eye on this beauty, from Crate and Barrel, and I still LOVE it. But really, I have a three year old who likes playdough. And a puppy who likes to climb on the table. And I’m not the neatest cook. I’m not sure a marble table really fits my lifestyle, you know?
My next thoughts were an antique farmhouse table, like this beauty. (Actually, I drool over this entire kitchen. LOVE it.)
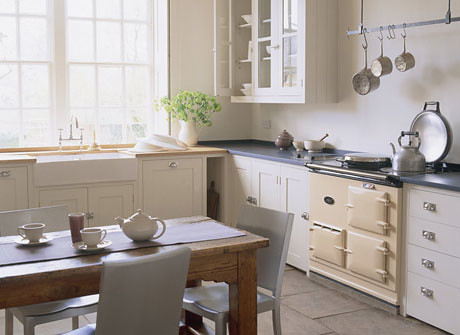
Sadly, I live in California, where something is “antique” if it’s 10 years old. And these things cost an arm and a leg to ship (and to buy in the first place). I looked at some of the big box stores, but I wasn’t digging the shiny finishes and fake distressing. We also needed a specific size to fit the built in banquette, and it proved difficult to find.
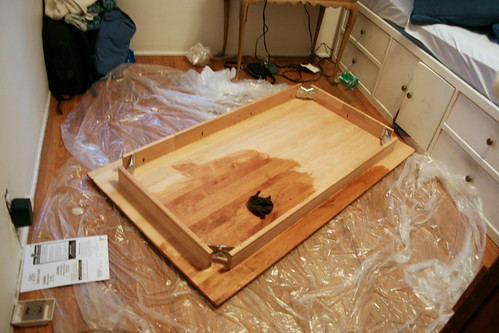
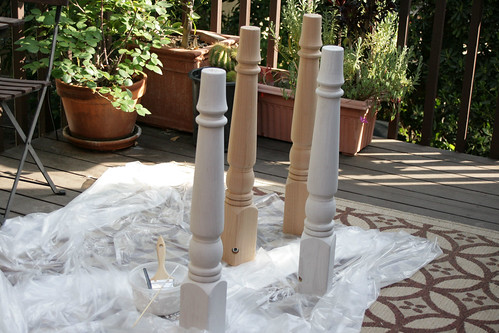
So I decided to make my own. Now, theoretically, I could build my own, but I wanted the table to be a) flat and b) sturdy, so I didn’t think that was the BEST idea. Enter the unpainted furniture store. I ordered a table (luckily in the perfect size) made from alder (technically a hardwood, but a soft one, so not as soft as pine), chose the leg style I wanted, and to boxes arrived at my house.
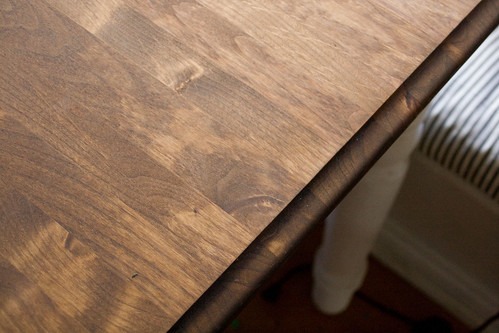
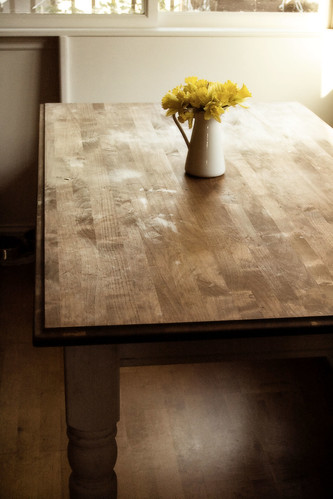
I wanted that antique feel, and I also wanted my table to be food safe, so I decided to finish the top with tung oil. Pure tung oil is food safe, environmentally friendly, and relatively durable as a finish. It will protect the table from water damage, and can be renewed. It’s also cool because it penetrates the wood, so an errant knife slip won’t ruin your table’s finish forever. And the kicker? Easy to apply and no fumes. I used a citrus based solvent to thin the oil for application, which was also food safe. And made my house REEK of oranges for a week.
I turned the guest bedroom into a workshop, and got to work. (The Tung Oil is easy to apply, but requires several coats, each of which requires overnight drying time. I couldn’t work outside, given all the rain we were having.) The first coat was 50% solvent, 50% tung oil, and I applied it with a rag (from an old tee shirt). I had to apply about 6-7 “coats”, letting each coat dry about 30 minutes to let the wood absorb the oil, and then reapplying until the wood wouldn’t absorb any more oil. That was the first coat (and took ALL DAY). Subsequent coats went on with the same rag, using a slightly higher proportion of oil to solvent. I applied 6 full coats to maximize water resistance.
The apron and legs were easy — those I painted with milk paint. An environmentally friendly paint that lends a touch of historical authenticity (milk paint has been in use for hundreds of years) and looks a bit “distressed” from the get go. Best of all? It’s designed to go on bare wood — no primer is needed (or desirable). You mix the powdered paint (I used the “Pearl” color) with water, let it sit for about half an hour, and apply with an inexpensive natural bristle brush. It went on quickly and dried fast. I applied two coats, and the paint dried flat with some lovely streakiness and a light distressing. You can apply polyurethane over milk paint to “seal” it, but I wanted my table to “age”, and the finish becomes sturdier and more water resistant as time goes on.
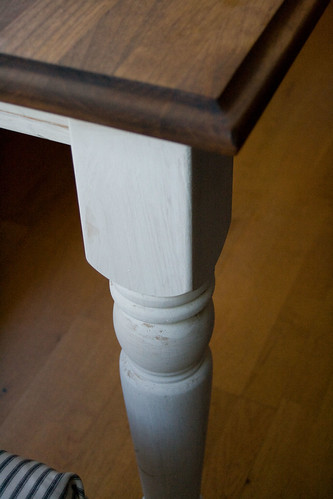
The result? A kitchen table that’s functional, and even beautiful. Now we eat more meals in the kitchen, sit around the kitchen table to chat, and even though we have a bigger table, it really opens up the space.
Stay tuned for more in my mini kitchen renovation!
Fun post, and great work on the table that really matched you! Can’t wait to see the rest as it goes along.
Your table turned out gorgeous!!! I know you will have many happy hours around it! When we remodeled our kitchen, I had to get rid of our large butcher block table that I loved – nothing beats a nice sized wooden table in the kitchen!
I’m impressed! I’d never think to try and make my own table….
Can’t wait to see the rest..
Looks great – i’m impressed. I’ve never really attempted a do it yourself project like this.
I’m incredibly impressed that you made and finished your own table!!! We’re right in the middle of a kitchen remodel ourselves… and I have no idea what kind of dining table I want to have. Thanks for sharing your story.
[K]
That is a gorgeous table! What is the “unpainted furniture store” that you speak of? Please share so we can use your resources. Thanks!
All clear finishes are “food safe” after they dry.
Hate to tell you this but your Tung oil is about 90% varnish with some fillers added and maybe a little Tung oil in it.
Many Tung oil finishes I have seen don’t even have Tung oil in them, they are basically wiping varnishes.
True Tung oil at full strength takes a week to cure if it ever cures at all.
Thanks for the info! What I like about the tung oil is that, unlike my experience with polyurethane, it doesn’t flake off, even when the table gets scarred, and nobody is ingesting it. As for the proportion of Tung Oil, I feel pretty confident about my source, which is linked in the body of the post, though I’m sure other tung oil products contain a very low proportion of tung oil. There was a curing time involved.