
I was very sad to have missed the summer jam season this year. With all the craziness around buying the house and moving, I never got around to putting up plum jam, or strawberry balsamic, or peach and basil, and my stash from last year is getting dangerously low. Fortunately, I still have a few seasonal fruit tricks up my sleeve. Like this pear jam with vanilla beans, which will make your heart swell with domestic pride and impress anyone you care to give it to.
Jam seems terribly intimidating, but really, it’s not. Yes, there are a few basic steps you need to go through to make sure it’s safe to eat (or really to store) but the risks of contaminated jam are much lower than for canned vegetables because both the acid and the sugar in jam act as preservatives. You don’t need any special equipment, other than jars (I get mine at the local hardware store — you can reuse jars, but make sure to get new lids, which you can buy separately) and a big pot to boil them in. An hour’s worth of effort (and not MUCH effort, really – most of it involves occasional stirring or waiting for the water bath to boil.)
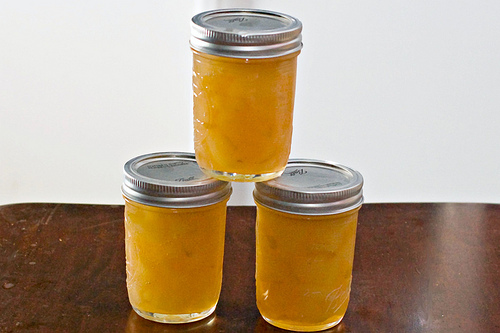
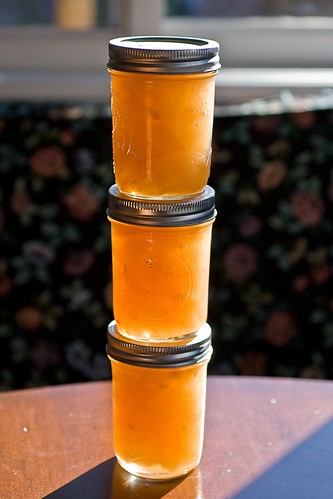
And the result? Golden jars of sunshine, lined up in your pantry, making you proud, waiting to be doled out to deserving friends and family this holiday season.
And if you think that you or your family and friends don’t eat jam, here are some serving ideas:
Stir it into oatmeal
Top crackers with brie and a dollop of pear jam
Spoon it atop ice cream
Plop into pastry shells to make jam tarts
SCONES
And there’s always toast. We’re quite fond of it in our house.
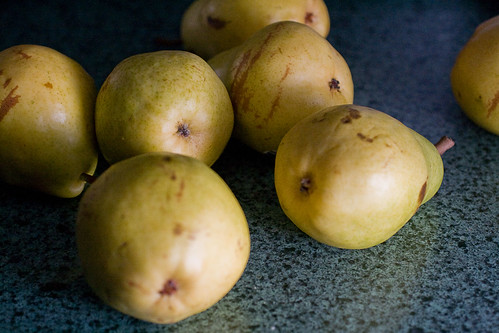
- 3 lbs ripe Bartlett pears
- 12 oz. granulated sugar
- ½ vanilla bean, slit lengthwise
- Juice of 1 lemon
- 1 pouch liquid pectin
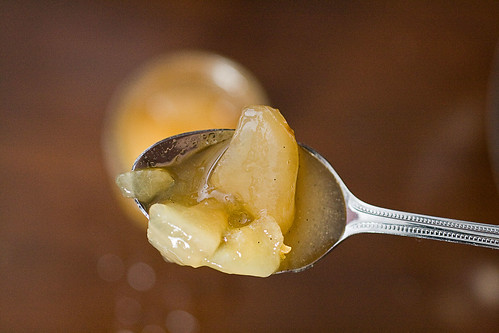
- Peel the pears, core them and cut them into small chunks. Place in a large saucepan with the remaining ingredients. (I like my pear jam chunky to preserve some of that grainy "pear" texture -if you don't, mash them a bit in the pan). Cook over medium heat, stirring frequently, until the jam begins to gel --test it by dropping a spoonful on a cold dish and dragging the spoon (or your finger, after it's cooled a bit) through it -- if it leaves a trail that takes a few seconds to be filled in, it's ready.
- Meanwhile, heat 4½ pint jars in a stock pot full of boiling water. When your jam is ready, pull the jars out of the boiling water and fill them with hot jam. Leave ¼ inch space between the top of the jam and the top of the jars, and run a clean (pref sterilized) knife around the edge of the jars to let any air bubbles escape). Wipe the top of the jars with a clean damp towel to ensure a seal. Cover the jars with the lids and the rings, and return them to the boiling water, making sure the water covers the jars entirely. Cover the pan, and let boil briskly for 10 minutes. Remove the jars from the pan, and let them cool to room temperature.
Beautiful pears and a touch a vanilla too. Nice job. GREG
I’d love to find a jar of this in my Christmas stocking!
Sounds amazing! I’ve always been so intimidated by the process….
Jam does seem intimidating! But I keep seeing eye-candy recipes like yours all over the blogosphere and am tempted to conquer my fears. 🙂
I made this and it’s DELICIOUS!
Glad you liked it!